Getting Started · 3 of 17
Before you Start
The software Claude Code needs, how to install VS Code and Claude Code, and how to sign in with your work account.
Claude Code needs a few pieces of software on your computer. The full list is below so you can raise it with IT once, rather than going back three times.
| Software | Required? | What it is for |
|---|---|---|
| VS Code | Required | The free Microsoft editor you work in. It puts your files, an editor, and the terminal Claude Code runs in, all in one window. |
| Node.js (includes npm) | Required | The free runtime that installs and runs Claude Code. If the Claude Code install command below reports that npm is not found, this is what is missing. |
| Git | Recommended | Version control on your own machine. Git is the program you install; GitHub and Azure DevOps are separate online services that store code. The two are easy to confuse. |
| GitHub or Azure DevOps account | Only for code stored online | Needed to open or contribute to work hosted online. Not needed if you are working with files on your own machine, which is the common case. |
Installing VS Code, step by step Only if VS Code is not already on your desktop.
-
Download VS Code
Go to the official Visual Studio Code website and download the version for your operating system. It usually detects whether you are on Windows or Mac and offers the right one. If your firm provides software through a managed portal or company store, use that instead, and check with IT if you are not sure which route applies to you.
-
Install it
Open the file you downloaded and follow the prompts. You can accept the standard options; there is nothing you need to change. Installation takes a minute or two.
-
Open it
Launch VS Code the same way you open any other program. The first time, it may ask a few setup questions about appearance and preferences. You can accept the defaults and move on; none of them affect the work you will do.
-
Take a quick look around
Spend a moment getting your bearings. There are three parts worth knowing:
- The file explorer on the left. This is where your files and folders appear, like a familiar folder view. You will open your deal folder here.
- The editor in the middle. This is the large central area where a file’s contents are shown when you open it.
- The terminal at the bottom. This is a text area where Claude Code does its talking. When you type an instruction and read Claude’s plan, this is where it happens. It may be hidden at first; you can open it from the View menu.
That is the whole setup for VS Code. You do not need to learn its many features. Knowing where the file explorer, the editor, and the terminal are is enough to get started.
Opening the terminal
The terminal is where you talk to Claude Code, and where you install it in the first place. In VS Code, if you cannot see it at the bottom of the window, open it from the menu: View -> Terminal. A panel appears with a blinking cursor, waiting for you to type. That is all a terminal is: a place to type one instruction at a time and press enter.
Here is the whole window, so you can see where each part sits. Your files are in the rail on the left, a file is open in the editor in the middle, and the terminal runs along the bottom. The three commands below are exactly what you will type next.
- deal-screen/
- data.csv
- notes.txt
- CLAUDE.md
CLAUDE.md

What this project is:
A private equity deal screen. Review the
source files and draft clear summaries.
you@laptop deal-screen %

$ npm install -g @anthropic-ai/claude-code
added 1 package in 4s

$ claude
Opening your browser to sign in...
Signed in as you@yourfirm.com

Welcome to Claude Code. What would you like to do?
>
Installing and signing in
-
Install Claude Code
In the terminal, type the install command exactly as written below and press enter. This downloads Claude Code and makes it available on your machine. It runs once; you will not need to repeat it.
npm install -g @anthropic-ai/claude-codeIf the terminal reports that
npmis not found, Node.js is not installed yet. Node.js is the free runtime this command needs. Ask IT to install it, or to run this step for you, rather than downloading it yourself on a managed device. -
Start Claude Code
Still in the terminal, type the command below and press enter. This starts Claude Code in whatever folder you have open.
claudeThe first time you run it, Claude Code will offer to sign you in and open your browser to do so.
-
Sign in with your work account
In the browser window that opens, sign in using your work account through single sign-on, the same login you already use for firm systems. There is no separate password to create and no personal account to set up. If you are ever signed out later, type
/loginin the terminal to sign in again. -
Confirm it is connected
Once you are signed in, the browser hands you back to the terminal and Claude Code shows a ready prompt. That prompt is the sign that everything is connected. You can now type an instruction in plain English and begin.
That ready prompt at the end, the > waiting for you, is the sign that everything is connected. From here on, you type in plain English and Claude Code replies.
You stay in control
The most reassuring thing about Claude Code is how it behaves once it is running. It does not change your files behind your back. Before it edits anything, it shows you a plan in plain English and waits for you to approve it. Nothing happens until you say yes. If the plan is not what you wanted, you say no and adjust the instruction. This approval step is not an obstacle; it is the safety rail that lets you work confidently, because you always see what is about to happen before it happens.
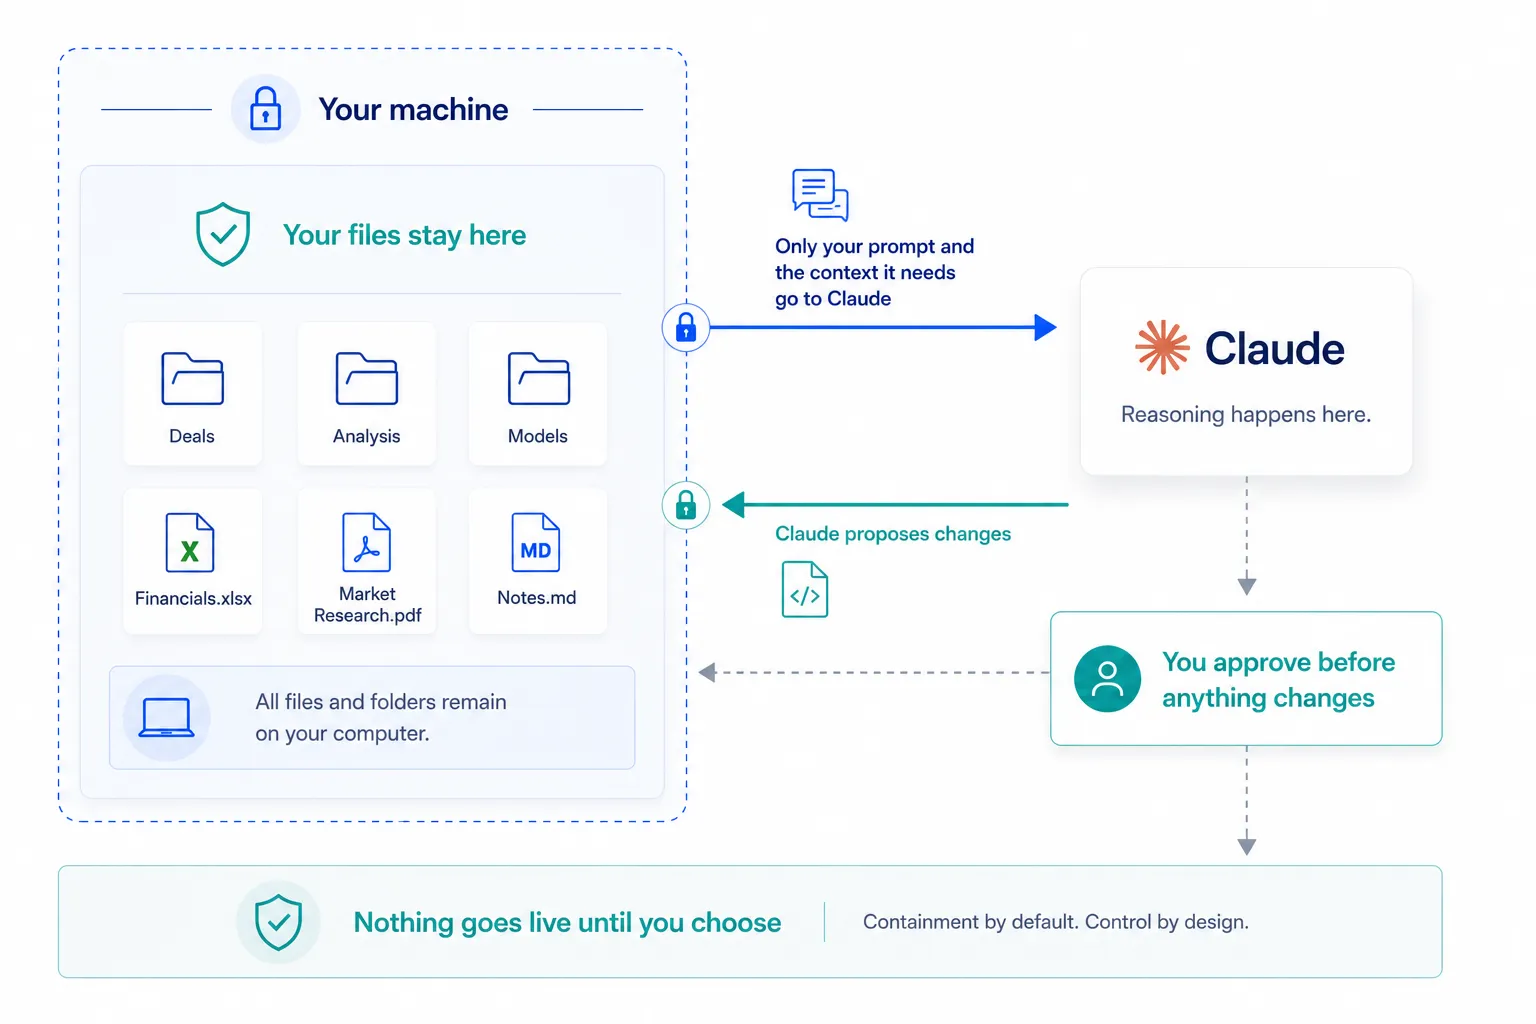
Once you are signed in and comfortable with the approval model, you are ready to do real work in your files. The approval step will quickly become second nature: read the plan, say yes, and watch it done.